.png)
HOW TO CREATE A CUSTOM EVENT IN BUNCE
How to Create an Event in Bunce
Events are actions that your users perform within your application. Examples include “Signed up”, “Made a purchase”, “Clicked a button”, etc. At Bunce, we want to enable you to create these events for these actions so you can segment users and interact with them in the future using this information.
Steps to Create an Event
1. Click on Create Event
Start by clicking the "Create Event" button on your dashboard.

2. Input Event Details
- Name: Enter the name of your event.
- Description (Optional): Provide a brief description of your event.
3. Set Event Parameters
- Email / Customer ID: At least one of these is always required, as it identifies the customer.
- Additional Parameters: Add other fields such as Phone Number, Status, etc.
- Select Data Type: Choose the appropriate data type for each parameter.
- Required/Optional: Indicate if the field is required or not.

4. Click on Create Event
After entering all the necessary details and parameters, click the "Create Event" button.

5. Event ID Generation
Once the event is created, an Event ID will be generated for you.

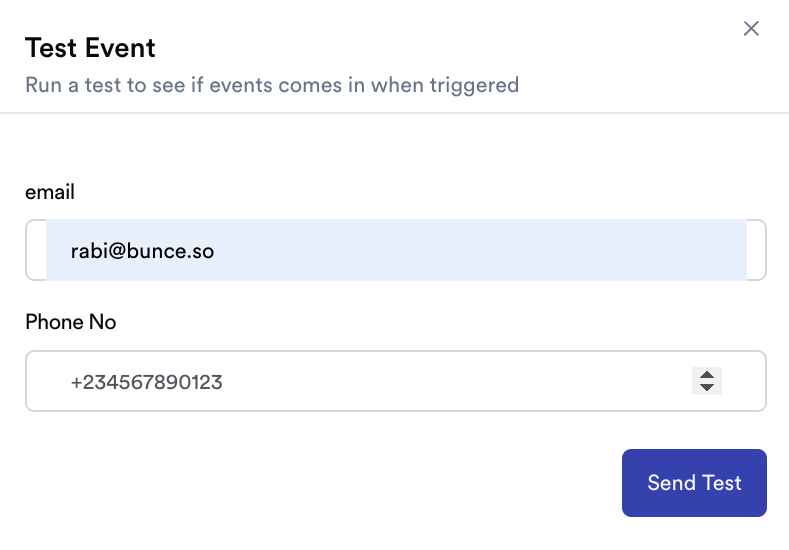
6. Test Your Event
- To ensure the event works correctly, click on the Test button located at the top right.

- Fill in the parameters and trigger the event for the customer.
7. Use Event ID
Copy the Event ID to set triggers for the event in your application.
Using the Created Event
- Workflow Checks: The created event can be used to run checks within a workflow ("Event Check"). See here
- Campaign Triggers: The created event can also be used as triggers for campaigns ("Event Trigger"). See here