.png)
DRAG AND DROP-- EMAIL TEMPLATE EDITOR
Bunce's Drag-and-Drop Email Template Editor is an intuitive tool that simplifies the process of designing professional email templates without requiring any coding knowledge. This guide will walk you through how to use this feature effectively.
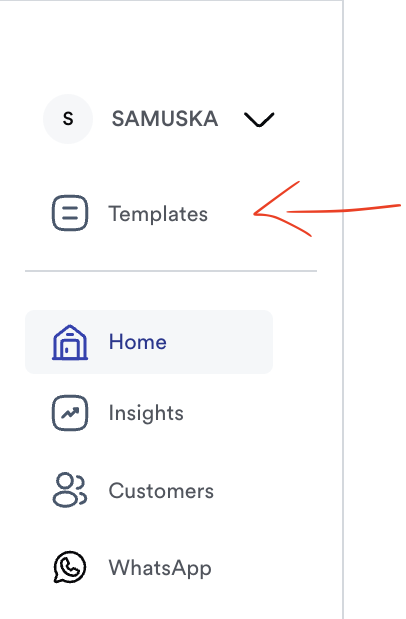
To explore the Drag-and-Drop Editor, on the Bunce app, after you are logged in click on template on the side menu Bar.
How to Use the Drag-and-Drop Editor
- Creating an Email Template
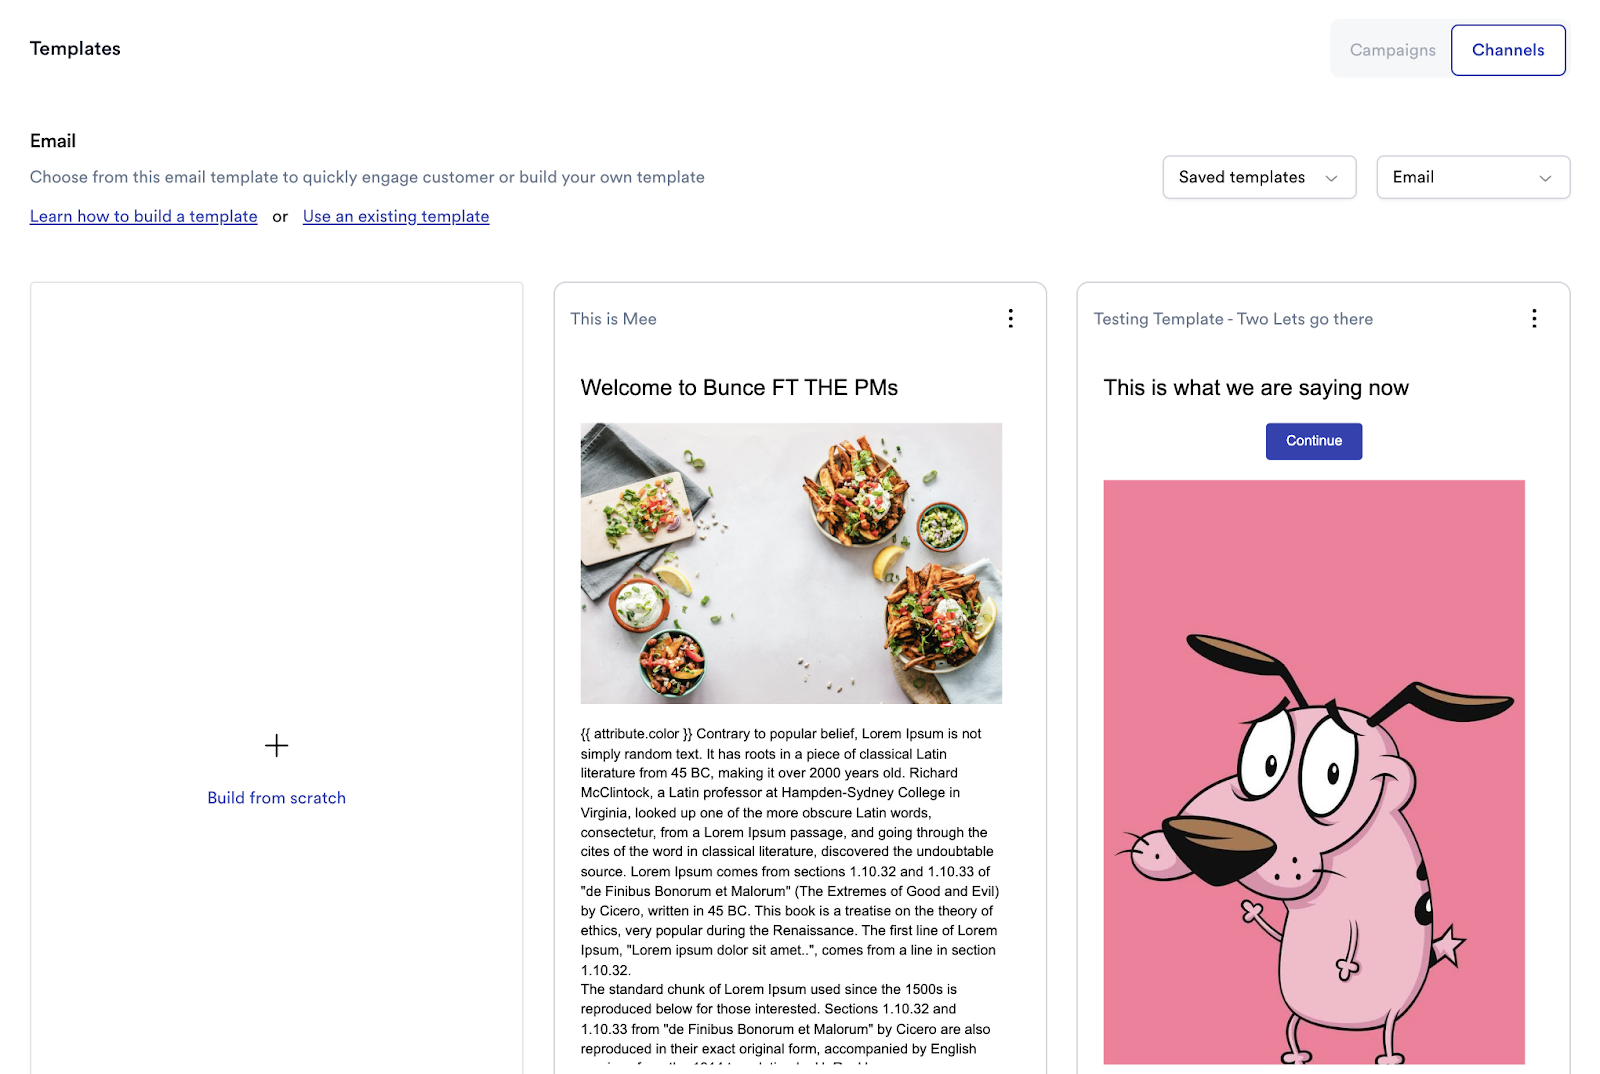
- On the email template page you can either:
- Build from Scratch: Start designing a completely new email template.
- Select an Existing Template: Use and customize pre-designed templates available in the library.
- On the email template page you can either:
Building from Scratch
If you choose to Build from Scratch, you’ll see a user-friendly interface divided into three key sections: Contents, Blocks, and Body. Each section contains tools to help you design your template.
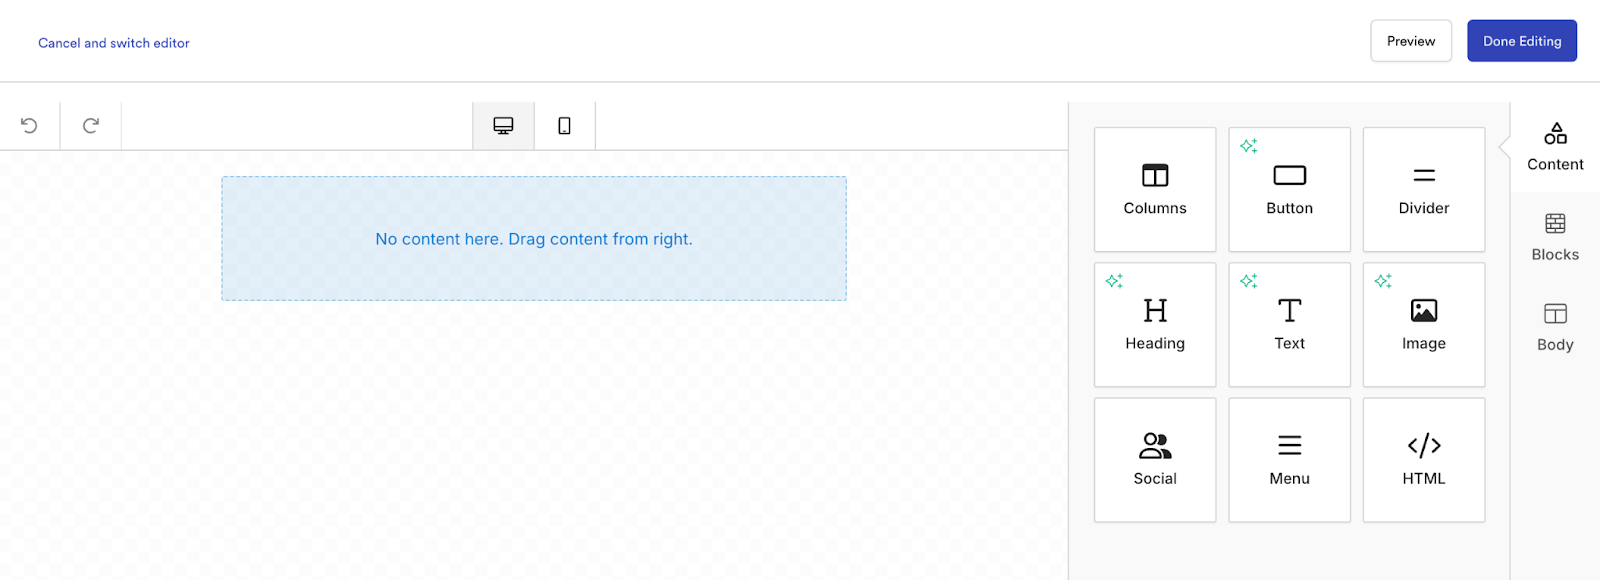
1. Contents
The Contents section provides individual elements you can drag and drop into your email design. Here's what each item means:

- Columns: Use columns to divide your template into sections, arranging content side by side. You can choose single-column, two-column, or multi-column layouts based on your design needs.
- Button: Add clickable buttons to your email (e.g., "Shop Now," "Learn More"). Customize the button text, color, size, and the URL it links to.
- Divider: Insert horizontal lines to separate content sections, improving readability and design clarity.
- Heading: Add a headline to your email to grab attention. You can customize the font, size, and alignment to make it prominent.
- Text: Insert text blocks for the main body of your email. Edit the font style, size, and color to match your branding.
- Image: Add images to your email to make it visually appealing. You can upload files, adjust sizes, and add alt text for accessibility.
- Socials: Include social media icons that link to your platforms, encouraging recipients to connect with you on social channels.
- Menu: Create a navigation menu with links to specific sections of your email or website, making it easier for recipients to explore.
- HTML: Insert custom HTML code for advanced customizations that are not available with the standard drag-and-drop tools.
2. Blocks
The Blocks section allows you to structure your email layout. These blocks act as containers that hold various content elements.
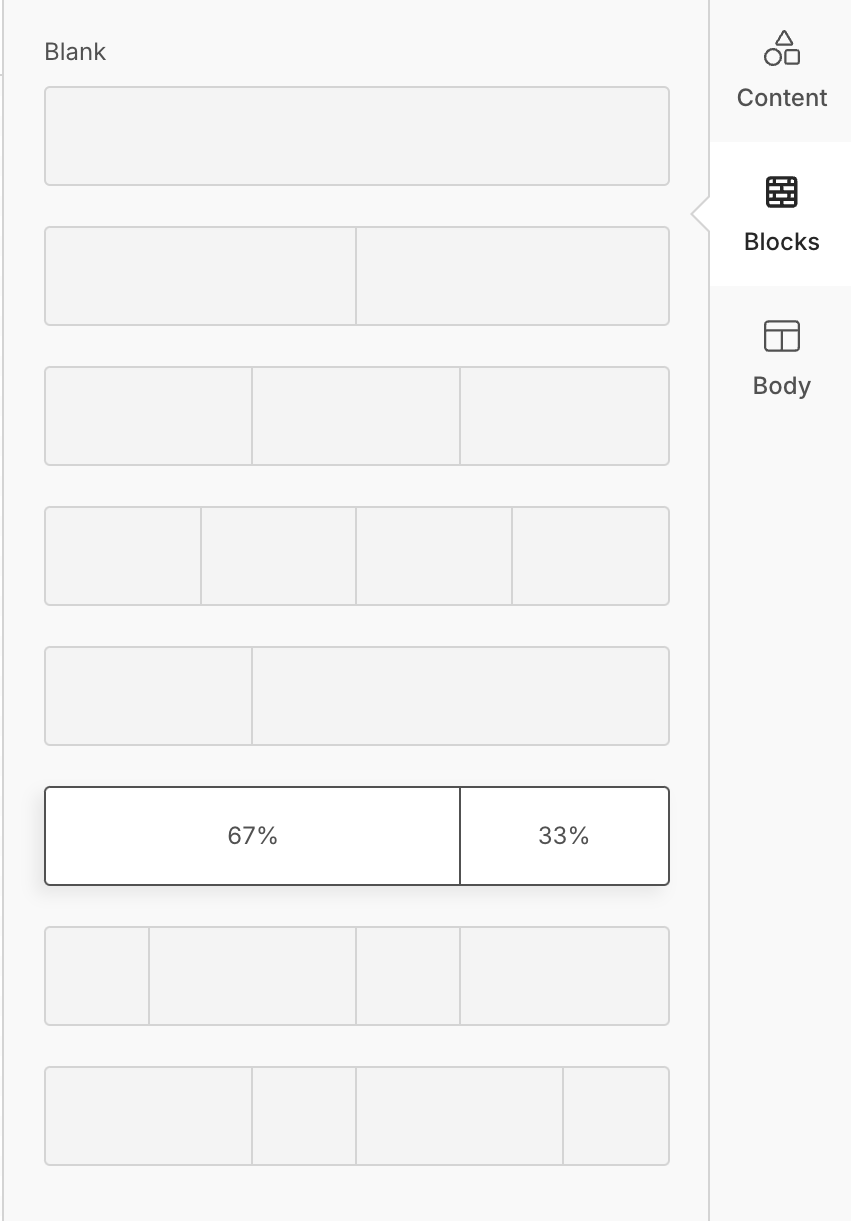
- Purpose of Blocks: Use blocks to organize your email into distinct sections, such as headers, footers, and content areas.
- Customization Options: Adjust block spacing, alignment, and padding to maintain a consistent and professional appearance.
3. Body
The Body section focuses on the overall design and style of your email. Here, you can customize global settings that apply to the entire template.
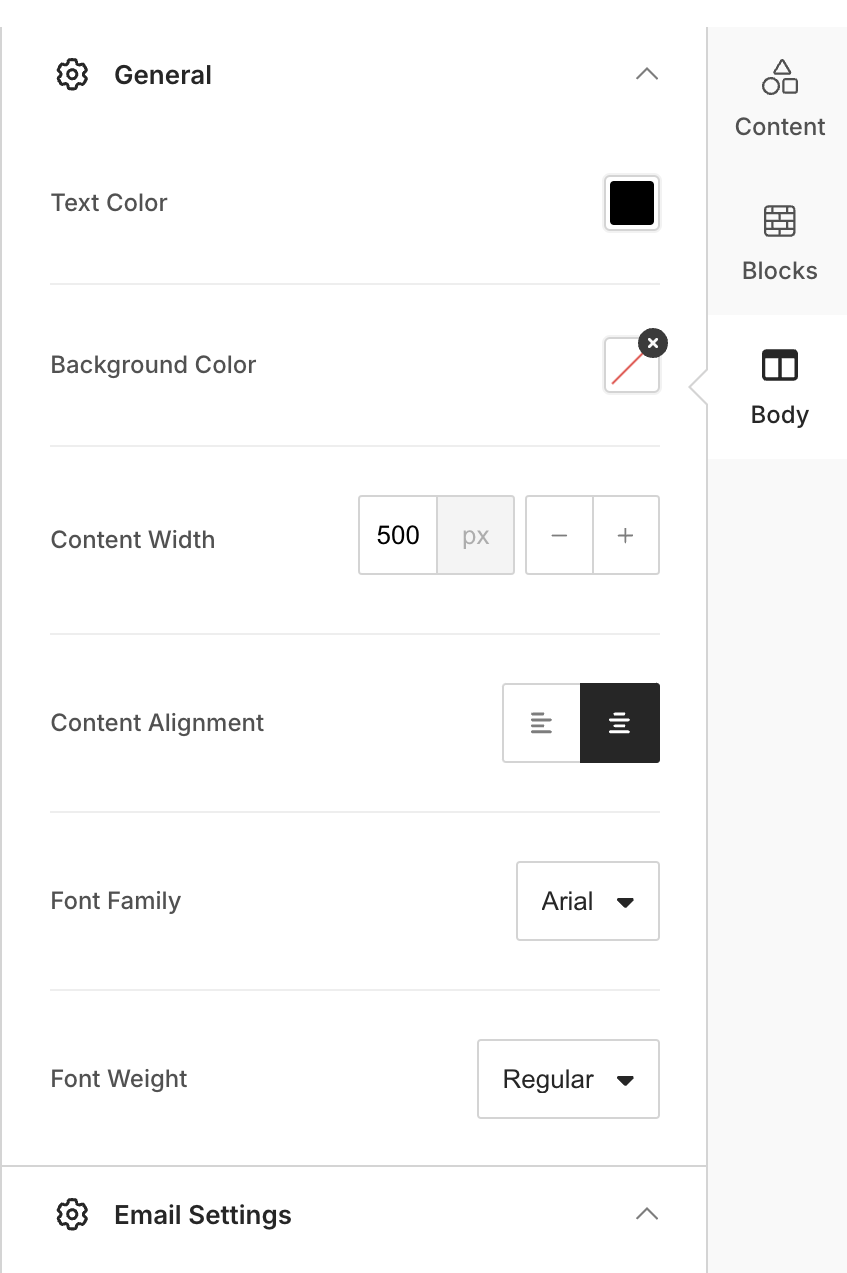
- Fonts: Choose the font style and size for your email content, ensuring it aligns with your brand guidelines.
- Links: Customize the appearance of hyperlinks, including color and underline options.
- Background Color: Set the background color for your email to create visual contrast or align with your brand’s theme.
- Default Padding and Margins: Adjust padding and margins to control spacing between sections and ensure your email looks clean and well-organized.
Key Tips for Using the Drag-and-Drop Editor
- Preview Your Design: Use the preview option to see how your email will look on desktop and mobile devices.
- Save Frequently: Save your template periodically to avoid losing your work.
-
Use Existing Templates for Inspiration: If you're unsure where to start, browse and customize existing templates to speed up the design process.
Watch the video here to learn more about the drag-and-drop email editor template.